

Let’s get these cheap switches talking to Siri shall we?
Apple’s HomeKit enjoys much lower compatibility with third party services than Amazon’s Alexa and Google’s Home. Whether that’s due to a greater desire for security on Apple’s part or a desire to implement direct control that will allow devices to be supported even after third party services shut down is just conjecture on my part. However, for those willing to tinker a bit, you can get HomeKit to speak to many more services than Apple natively allows. The key that unlocks this is Homebridge.
What is Homebridge?
Homebridge bills itself as “HomeKit support for the impatient.” It runs on multiple hardware platforms (yes, you’re going to need to implement some hardware) and acts as a bridge that connects HomeKit to the unsupported platforms. Plugins are used to support different third party integrations.
Why Homebridge for me?
In previous posts I’ve shown how to control lights using the eWeLink and Google Home apps on iOS however these don’t offer the native integration into iOS that I’d like to use. Being able to say “Hey Siri, turn on Table Lamp” to my Apple Watch would be lovely.
Pros and Cons
Pros:
- The software is free – Uses Apache License 2.0
Cons:
- You’ll need some hardware to run Homebridge.
- That hardware needs to run 24/7. If it goes down, so does the ability to control your devices via HomeKit.
- You’re adding another internet connected device to your network, secure yourself appropriately.
- The eWeLink plugin that I’m using requires you to give it a user name and password.
- The implementation is much more involved that just using eWeLink or Google Home apps.
Hardware Requirements
Homebridge can run on a variety of hardware so you can test it on a device you have already. I’ll be re-purposing the Raspberry Pi Zero W I bought a few years ago to make my TV smart. It’s possibly the lowest power hardware that Homebridge supports.
NOTE: THIS GUIDE WAS PUBLISHED IN 2020 AND IS NOW OUTDATED. Please find a newer guide that provides correct instructions as of 2023 and later.
Step 1 – Get Homebridge Running on Raspberry Pi
Since I’m not running anything else on this Raspberry Pi, I chose the easy method of flashing the Homebridge Raspberry Pi Image.
You can start by following the excellent guide provided by Homebridge. This will take you all the way to having Homebridge running on the Raspberry Pi. For reference, I used the Raspbian-Homebridge-v1.0.6.zip image. No comments from me on the process, all steps worked perfectly.
Once you reach Step 6, continue here for the setup of the eWeLink plugin.
Step 2 – Add eWeLink plugin to Homebridge
So now Homebridge should be up and running, connected to your iOS device and you’re ready to install the eWeLink Plugin.
(edit: 10/01/2022 – the below is outdated, currently using homebridge-ewelink v8.10.0. Please adjust your setup accordingly.)
Click Plugins on the top menu, search for ewelink and install the homebridge-ewelink-max plugin by howanghk. This seems to be the most stable and longest maintained plugin for eWeLink that is available.

After installing you will be presented with this screen:

But before putting in any details here, we need to create another eWeLink account to use just for Homebridge and share any relevant devices to that account. The reasoning and steps for this can be found here.
In version 0.1.24 of homebridge-ewelink-max (used in this guide) and perhaps previous and future versions, this settings panel only accepts phone numbers and passwords (and not email addresses and passwords as one would use in South Africa). So we’ll have to do some tweaking later on. For now, set Country Code to 1 and put in your newly created secondary email account in the Phone Number field. Fill in your Password and in the IMEI field you can use one generated here. When you’re done, close the “group” so it looks like this with all your details:

Then click SAVE and then Config on the Top Menu. Now we’ll make the tweaks to use the correct Country Code and Email parameter. Change your country code to 27 (for South Africa) and phoneNumber to email so it resembles the below and click SAVE:

(You can also find a sample config.json here)
Then click the Restart Icon on the top right.
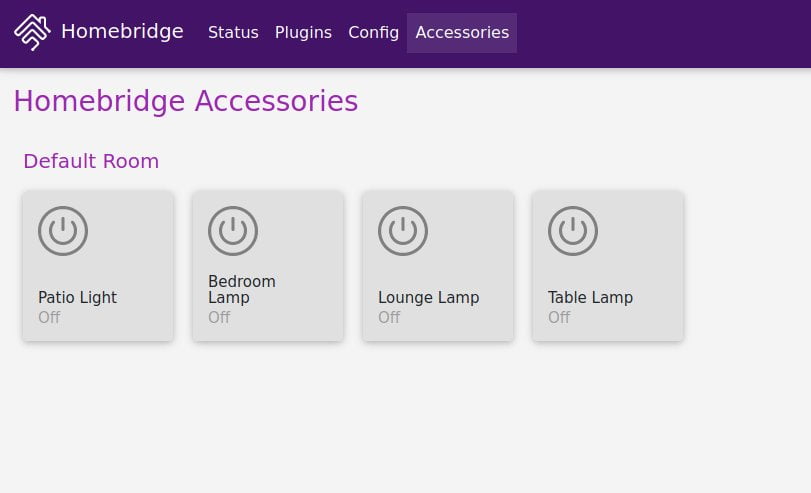
When Homebridge completes it’s restart, If you go to Accessories you should see all your lights there (and you can click on them to test)!
And they should also be added to all your iOS device/s as well! (Seen below on Apple Home app on iPad:

From here on, you can move them to separate rooms and rename them as you wish. You can also change the devices to Display As Switch, Fan or Light depending on your setup.
Post-Implementation Summary
When at home, I can now control all the lamps using the Apple Home app as well as Siri. My watch can now control the lights! It’s a bit slow on the Apple Watch Series 2 but it’s been quite reliable on the iPhone 8, X and iPad 6th gen that I also use.
My Smart Home Setup after this Implementation

The Future
Adding hardware running Homebridge has definitely made controlling the lights with my iOS (and watchOS and iPadOS) devices much simpler and native however not without some caveats:
- Doesn’t work when I’m away/not connected to the WiFi
- (Speculation) Still has to talk to eWeLink Cloud to control the devices.
To fix these will require more hardware to be purchased (Apple TV 4k or HomePod) and for the switches to be flashed so they will talk directly to Homebridge. I’m rapidly reaching the point where I have to make some decisions about how the smart home is architectured for compatibility with Android and iOS as well as running securely and locally. Will be taking you on this journey as well!
If you have any questions/would like to share your experience with Homebridge or architecting a smart home, please leave a reply below. Thanks for reading!

Controlling your home with your watch feels like the future!
Hi There. Great tutorial but I have an issue where my devices wont show up, everything else seems to work just fine. Everything is identical to above & checked over and over but no devices will show under accessories. Any Ideas ?
Hi Craig,
Thanks for your comment. It appears that since posting this guide in 2020 there are now significant changes to the software and setup. There also seems to be a few errors and omissions on my part. I’ll be adding a disclaimer to warn others until I can update the guide.
Here are a few things for you to try:
1) If not already, use the “homebridge-ewelink” plugin. Please ensure you’re using the latest version, currently v10.4.0. Instructions for setting up the plugin can be found here -> https://github.com/bwp91/homebridge-ewelink
2) eWeLink seems to operate best when the plugin uses the primary account. That is the account that you would have used on your phone to add the devices. Log out on your phone and try using those credentials in the plugin. If you want to use the app as well, the secondary account (the one with the devices shared to it) can be used there.
3) I also omitted the step to connect Homebridge to HomeKit by scanning the QR code. Navigate to “homebridge.local”, log in and scan the QR code there.
Hopefully this will help you get things up and running, good luck!